Visual Studio Code and Docker Extensions — Run your application using Docker
Visual Studio Code as IDE is a choice for many developer as it is faster and having other good features related to debugging and testing. In this article, I would like to point out the easiness it give to the developer to configure Docker for the application in few click.
Let’s start
We will use Node.js & express generator for the sample application.Run the below command to install express-generator to create an application skeleton
npm install express-generator -g
Step 1: Install the Docker Extension plugin to the workspace

Step 2: Open the folder where you want to create the application skeleton and run the below command .It will create the basic express based application.
express

Step 3 : Run yarn install or npm install

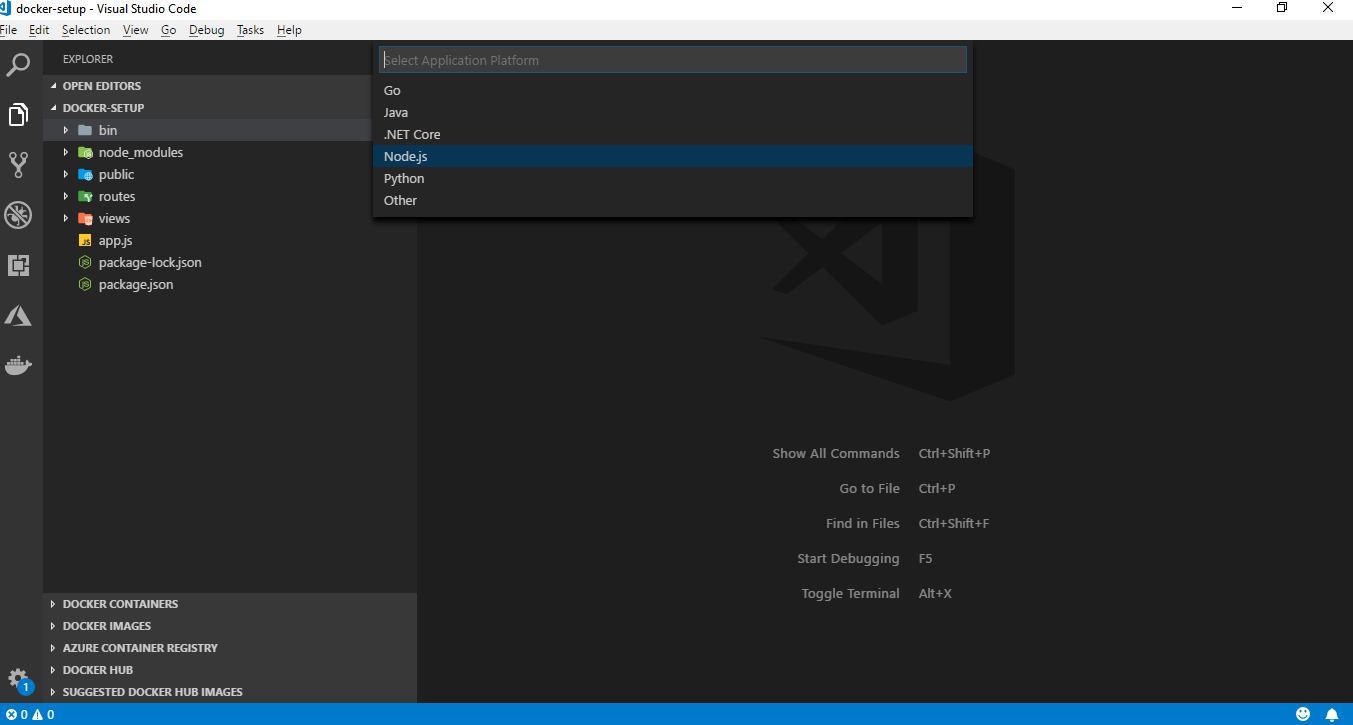
Step 4: Add Docker file to the application. Press F1 or Ctlr + Shift + P .It will open the window to select the command .Select the below steps
1. Select “Docker: Add Docker files to the Workspace “

2. Select Node.js as platform
3. Enter port no i.e. 3000 on which application will run.

It will add “Dockerfile “, “docker-compose.debug.yml” , “docker-compose.yml” to the Workspace.
Step 5: Now the next step is to prepare the build image which will have Node.js Docker base image and application code .
- Press F1 or Ctrl + Shift + P to open command window –Select Docker :Build Image

2. Select the Docker file which will be used for build

3. Tag the build image i.e. docker-setup/latest in our example case

Build preparation :

After the build is prepare ,Press F1 or Ctrl + Alt + P to select the command Docker run .Below command get executed .
docker run — rm -d -p 3000:3000 docker-setup:latest
You can see the container status and on which port it is running .In our sample it is on http://localhost:3000

Browse the URL to validate . Repository link github

Hurray !! Application is up and running on Docker — Happy learning